
Playing a vinyl record is one of those things that’s easy and straightforward when you know how to do it correctly. It’s also just as easy to get wrong and cause damage to your records, if you’re unsure of how it works.
It’s a question that a lot of people have when they’re getting into vinyl for the first time. I remember the first time I (tried to) play a record – I got it wrong and damaged one of my uncle’s!
So, it’s important to get it right! Not just to protect the record being played, but also to get the best possible sound. There’s a bit of a process to it, which is fast and easy to master, but is worth getting right first time around so that it becomes second nature.
To play a vinyl record, place it on the turntable platter. Start the turntable and clean the record with an anti-static brush. Use the cueing lever to raise the tonearm, and move it across to the record. Line the stylus up with where you want to start playing the record and then lower the tonearm.
It’s that simple, but as mentioned above there are a few extra things to be aware of when you use a turntable to play a record, and they’re covered in this article.
I’ve put together a clear step-by-step guide, with accompanying images, that shows you how you can safely play your vinyl records and be confident that you’re doing it in such a way that protects your records, takes care of your equipment and also gets the best sound!
Getting Set Up to Play a Vinyl Record
Before you start spinning your records, there are a few things you can check over quickly to make sure you’re all set for the best listening experience.
Check Your Turntable is Level
Always make sure your turntable or record player is level before playing records. Sometimes they can get a little off kilter, and a quick adjustment of the unit’s feet will ensure its steady and level. A record player that isn’t level can cause damage to records over time.
Using a high-precision turntable bubble level like this Audio-Technica one will help get your platter perfectly level (link opens in Amazon).
Remove the Dust Cover and Check the Record Player is Clean
It might seem like an obvious one, but removing the dust cover from your turntable (if it has one) prior to playing a record is necessary. It’s also worth checking that your turntable/record player is clean in general and free from dust before putting any records on it.
Check Your Record for Damage
A visual inspection of records before playing them usually helps to avoid any unnecessary damage to your stylus, as this delicate component is super sensitive to anything on the surface of a record. Also, ensuring your record isn’t dirty before playing it is important, as it may need a deep clean before you spin it – more on the cleaning of a record in the steps below.
Is the Tonearm Properly Calibrated?
If it’s been a while since you checked the calibration of your turntable’s tonearm, it’s always smart to do a periodic check on the tracking force, anti-skate setting, etc, to make sure things are all set right. This is important both for sound and stylus/record preservation.
A Quick Inspection of Your Stylus
These things are sensitive and will attract any dirt and dust that may be lurking in the atmosphere. The stylus will also scrape up any debris that remains in the grooves of the record, so giving the stylus a fairly regular check and a weekly clean with a stylus brush will avoid most issues.
Make Sure Your Speakers are in a Sweet Spot
If you’ve got a set-up that incorporates separate/standalone speakers, then positioning these correctly will massively affect the sound and your listening experience. You don’t want them to be too close to a wall, neither too close together – the ideal speaker set-up creates an equidistant triangle between yourself and the speaker.
A Step-by-Step Guide to Playing a Vinyl Record
You’ve picked out the record you want to play, your turntable or record player is all set, ready and waiting, let’s dive right into it…
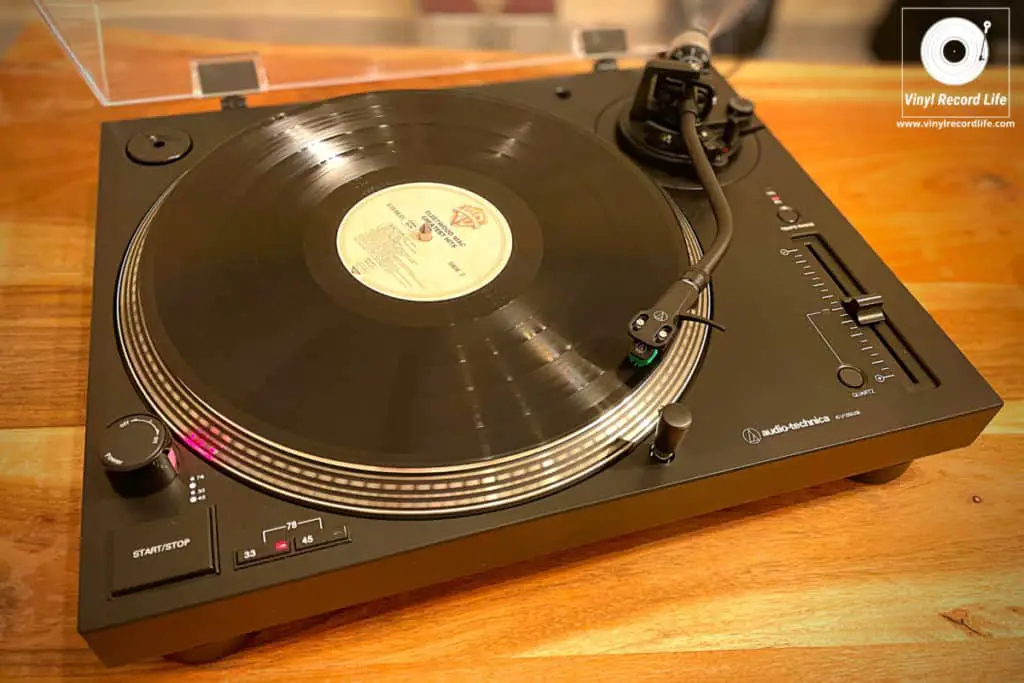
Step 1: Remove the Record from Its Sleeve and Place It on The Turntable
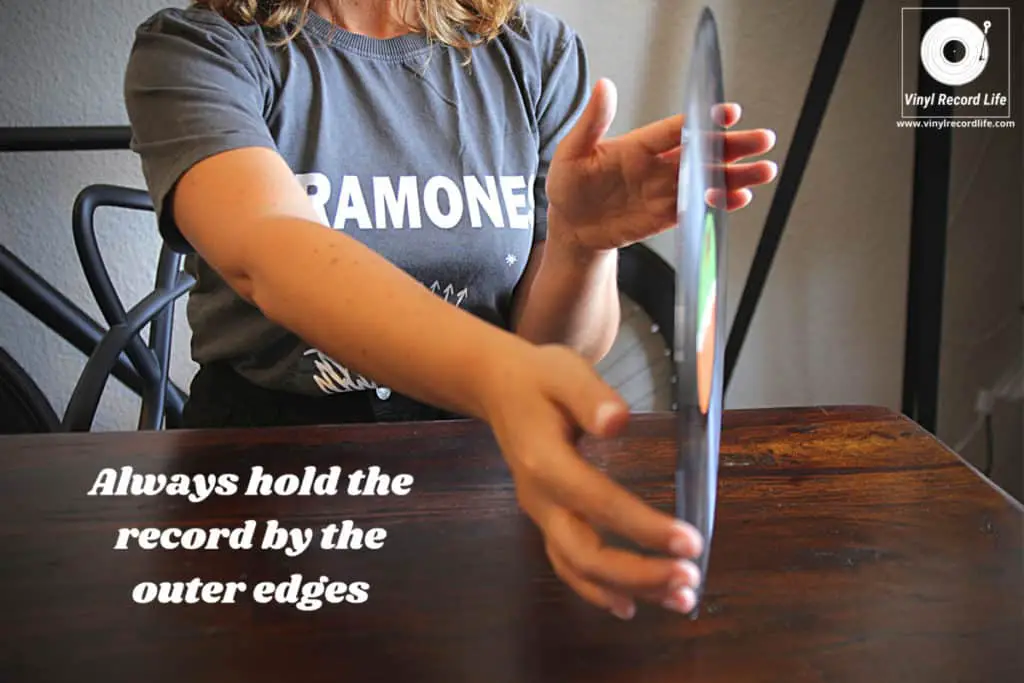
Carefully take the record out of its jacket and inner sleeve and place it on the platter of the turntable. Check out our guide on how to handle your records here if you’re not entirely sure of the best way to hold them.
Tip: always make sure you’re storing your records in decent anti-static inner sleeves. This is my recommendation – they’re the ones I use, they don’t cost very much and they do a fantastic job.
Step 2: Start the Turntable and Give the Record a Clean
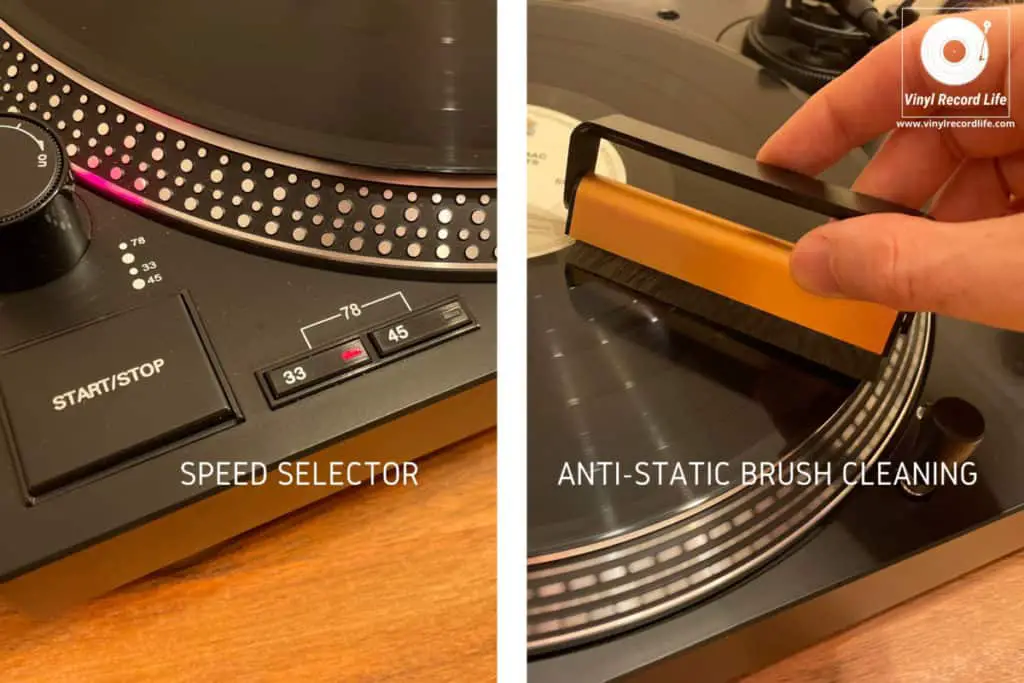
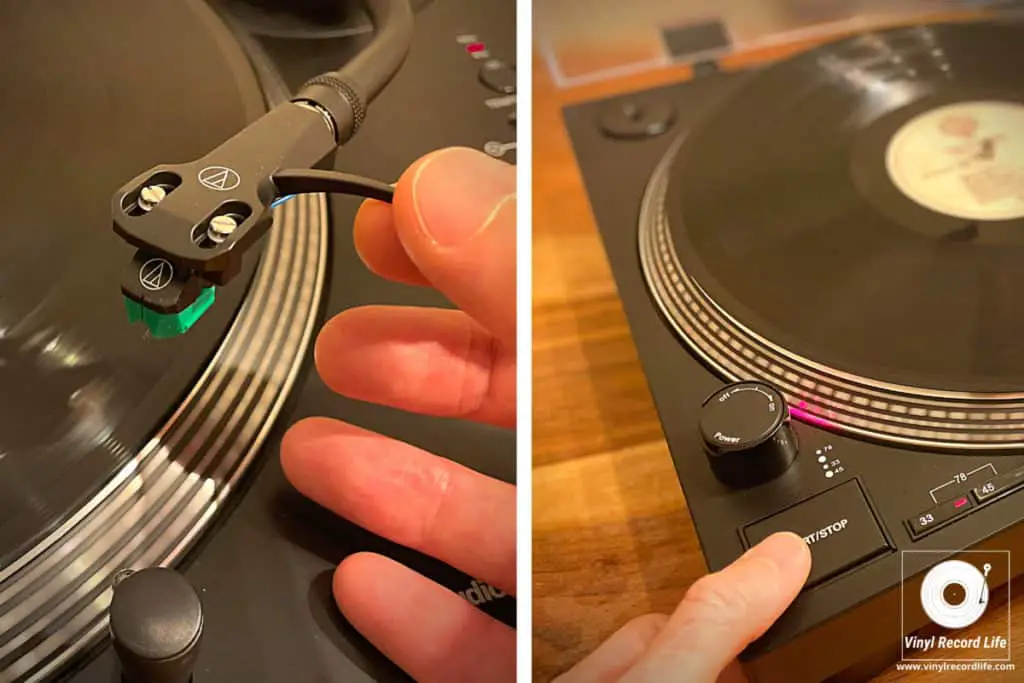
With the record sat on the platter, hit the start button to initiate the turntable and set the record spinning. Make sure you’ve switched to the correct speed selector, so that the turntable’s running at the speed which corresponds to the record.
With the record spinning, take an anti-static brush and gently clean the record to remove any dust or dirt that may be on the playing surface. If the record is brand new, it’s worth giving it a deeper clean.
For a detailed guide on how to clean your records we’ve got you covered with our Safest Ways to Clean Vinyl Records: A Guide (With Pictures) feature.
It’s important to give a record a quick dry clean with an anti-static brush both before and after playing, as it helps keep the record in great shape and also ensures you get the best possible sound when listening to it.
Step 3: Engaging the Tonearm
Now that the record’s spinning and has been cleaned, it’s good to go!
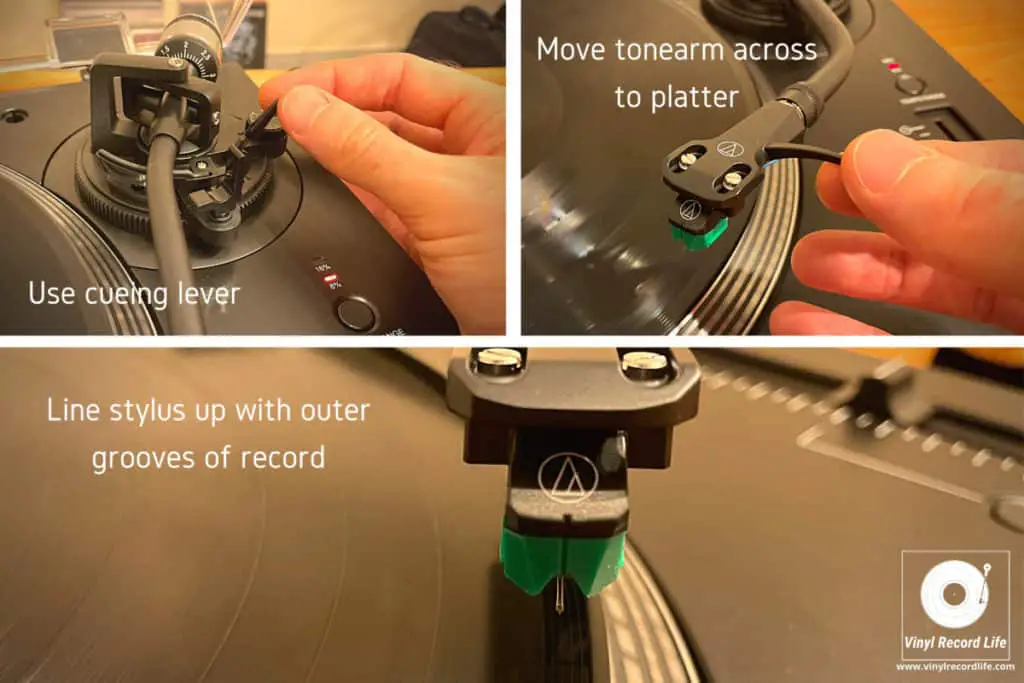
To engage the tonearm, use the cueing lever to raise the tonearm from its cradle. Once elevated, gently move the tonearm across to the edge of the platter, so that it is hovering above the outer edge of the record as shown in the picture.
A record always starts from the outside edge, and the needle works its way towards the center of the record as the music plays.
To play a vinyl record from the beginning, you’ll need to line the stylus up with the outer grooves on the outside edge of the record. Then, lower the tonearm gently using the cueing lever, and the stylus will come into contact with the record’s playing surface.
If you own a record player that doesn’t have a cueing lever, you’ll need to lift and lower the tonearm by hand. Do this with great care, as the stylus can damage the record if it comes into contact too aggressively (you can also damage the stylus). Resting your pinkie finger on something steady next to the platter will enable you to raise and lower the tonearm steadily.
Now that the record’s playing, you can sit back and enjoy the music!
Step 4: How to Change Songs on Your Record Player
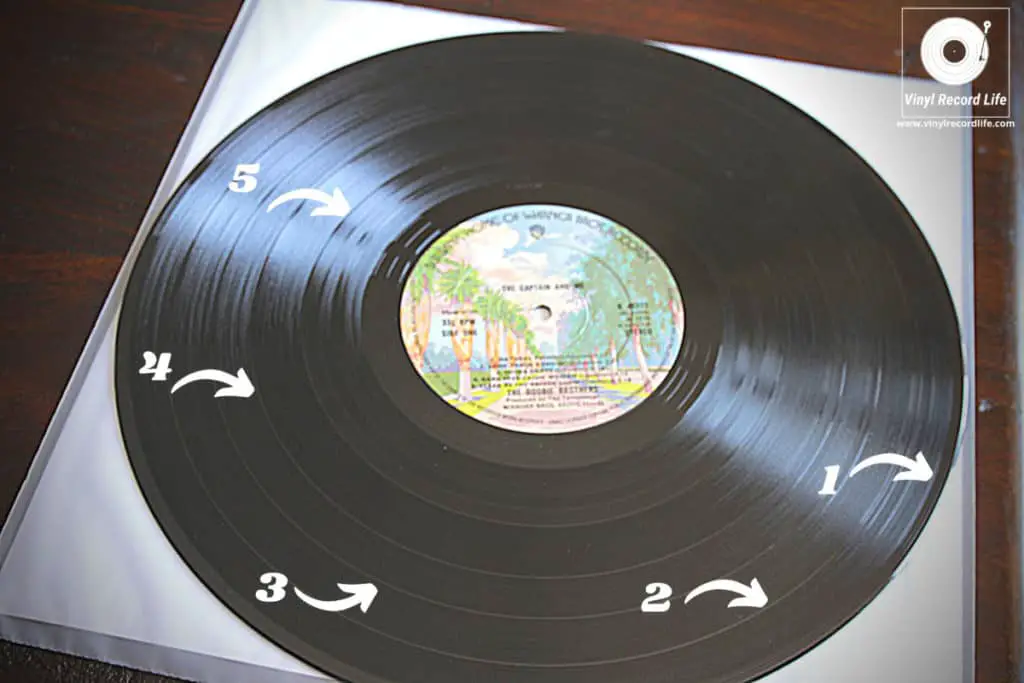
If you want to skip a song on your vinyl record or go direct to a particular track, you can move the tonearm to the start of the relevant track.
Identifying the start of each track on a record is easily done by counting the noticeable lines which mark the beginning of each track. Taking the same care to raise the tonearm with the cueing lever, and then lower it at the right place, you can simply go direct to the song you want to listen to.
For a full walkthrough on how to work out where each song starts on a vinyl record, and how to start playing from that track, check out our Guide to Changing Songs on a Record Player.
Step 5: How to Stop the Record
To stop the record, raise the tonearm using the correct method while the record is still spinning. Never stop the platter from spinning before you’ve raised the tonearm.
Return the tonearm to its cradle, and while the record is still spinning on the platter give it a dry clean with an anti-static brush, using the same process as in Step 2.
Once you’ve cleaned the record, hit the start/stop button to bring the platter to a stop, and return the record to its sleeve immediately, or turn it over and play the other side.
Useful Things to Know When Playing a Vinyl Record
Sometimes things go a bit wrong when you’re playing records, despite you taking great care to ensure the record and your equipment are all set up properly.
If you encounter any problems with the quality of sound when the record is playing, check out our troubleshooting guide which identifies various causes of bad-sounding record players.
Another possible problem can be the tonearm playing up. If you’re experiencing issues with the arm, see if they fall under any of the 10 most common ones we’ve identified here.
Something else that can affect your enjoyment of listening to a record is excess crackle. A certain amount of crackle is inevitable, and often adds to the richness of the listening experience (well, it does for me!), but too much is usually an indication that the record has a build-up of static, has embedded dirt, is damaged, or a combination of these factors.
To find out more about crackle, its causes and how you can minimize it, head over here.
Finally – but by no means definitively! – if your record sounds like its playing too fast, too slow, or has warps, lags or unusual drags or speed-ups in sound, it could be down to several reasons.
We’ve covered the causes of records playing too fast or slow here, so if you experience any issues in this area when playing your vinyl records be sure to give it a read.